AGGRO TOKEN DRUID DECK LIST GUIDE
- Last updated Apr 18, 2017 (Un'Goro Launch)
- Edit
- |
Wild
- 20 Minions
- 10 Spells
- Deck Type: Ranked Deck
- Deck Archetype: Token Druid
- Crafting Cost: 5760
- Dust Needed: Loading Collection
- Created: 4/11/2017 (Un'Goro Launch)

- Daolh2610
- Registered User
-
- 4
- 19
- 28
-
Battle Tag:
N/A
-
Region:
N/A
-
Total Deck Rating
130
Our Un’Goro Aggro/Token Druid deck list guide will teach you how to pilot this popular Season 37 deck! Our guide features mulligan, play, and card replacement strategies!
Introduction
Aggro/Token Druid is one of the most aggressive decks in the current meta. It wins the game by snowballing the board in the early game and finishing the game with high burst from Savage Roar. It runs multiple small minions, ways to generate tokens and AoE buffs. Some games end as soon as turn 2-3 after Druid overwhelms the whole board with 2-3 attack minions.
According to the statistics, it’s one of the strongest decks of the current meta, with third win rate across the board. At the same time, it’s severely underplayed, as it’s only ~4% of the ladder. The list I’m using for this guide was created by Chakki. It’s the most popular and probably most consistent list, but considering that every pro player’s deck list is different, the deck will most likely still go through a lot of refinement.
Aggro/Token Druid Mulligan Strategy & Guide
While I normally divide the mulligan into two sections (one vs Aggro and other vs Control), there is no need to do that this time, because mulligan is exactly the same no matter what deck you’re playing against. The deck proceeds with a very similar first turns game plan no matter who is the opponent.
Higher Priority (keep every time):
- Innervate – If you draw 2, you only keep one. But it’s one of the highest tempo cards in the whole game. For 0 mana, you gain two mana. While you lose a card in the process, it can let you snowball the early board really hard. For example, if you’re on the Coin, you can play 2x 1-drop and drop Ravasaur Runt right away. Now if you buff the whole board next turn, you end up with a HUGE board presence on turn 2.
- Bloodsail Corsair – Highest priority 1-drop. You keep it no matter if you face a weapon matchup or not. The card’s power comes from Patches the Pirate – you put 1/2 and 1/1 on the board with a single 1-drop, the 1/1 has Charge and since the buffs in your deck are AoE, you put 2 targets instead of one. Absolutely the best card to play on turn 1.
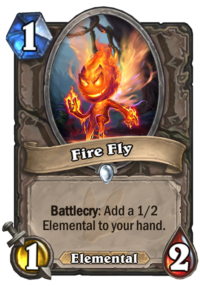
- Fire Fly – Second best 1-drop. While it doesn’t put 2 bodies immediately, you get a second 1/2 in your hand, which basically makes your curve much better and gives you another cheap buff target. After Bloodsail Corsair, the card is MVP of the deck.
- Argent Squire – Worse than the other 2, but you absolutely want to open with 1-drop (and often drop two 1-drops on turn 2), so it’s still a great keep.
- Mark of the Lotus – Your basic snowball tool. It’s already worth it after having only 2 minions on the board – it’s a +2/+2 for 1 mana. After you get out 3 minions, it’s great value. 4 and above, it’s amazing. The fact that you spread the stats makes it even better in the early game, because you’re not vulnerable to single target removals and it puts you out of range of the early game AoEs.
- Finja, the Flying Star – It might seem weird to keep a 5-drop in such an Aggro deck, but it’s correct. While you sacrifice some early game tempo (because you’re 1 card down in the first turns), you win most of the games where you get value out of Finja. On turn 6 you pull 2 Murlocs out of your deck and still have full mana to work with, so you can play something else + AoE buff, or Argus, or even Savage Roar if you pull out 2x Bluegill. The swing is simply amazing.
Lower Priority (keep only if certain conditions are met):
- Ravasaur Runt – If you already have Fire Fly , Bloodsail Corsair or Innervate – Runt is great if you hit the Adapt, but it’s really weak if you don’t. If your hand won’t allow you to activate it quite consistently on turn 2-3, then you don’t keep it. Without activating it’s a dead card, you don’t want to play a vanilla 2/2.
- Power of the Wild – Alternative to Mark of the Lotus if you have your 1-drops already. It’s a little bit more flexible, because you can also summon a 3/2, but you rarely want to do that in this deck.
- Tortollan Forager – If you already have your 1-drops. It’s just a card to follow-up the curve with.
Aggro/Token Druid Play Strategy
Like I’ve mentioned in the introduction, it’s one of the most aggressive decks in the current meta. It’s also one of the most draw-dependent decks of the meta. Getting a slow start more often than not means that you’ve lost the game. But some opening hands are so explosive that you pretty much win the game on turn 2-3 – basically there is no way some decks can deal with 3x 2/3 and 2/2 with Charge on turn 2 and it’s very possible with this deck (not to mention that this already huge board snowballs even further with more buffs).
Vs Aggro
Aggro Druid gameplay isn’t too complicated, but there is still some decision making, especially in the aggressive matchups. There are two words that describe those: board control. The deck which gains board control most likely wins. If you have no board, all your AoE buffs, Ravasaur Runt, Defender of Argus and Savage Roar are pretty useless. Half of your deck automatically becomes bad with no minions on the board. So don’t leave anything to your opponent – remember that face damage is NOT important. If there is a trade on the board that’s even remotely good for you then you should take it. Of course, you don’t trade 3/1 into 1/1, but even trades that are even and your opponent might want to make, you make them. Otherwise you can always get punished with some sort of buff, weapon etc. and start losing the board control – that’s something you don’t want.
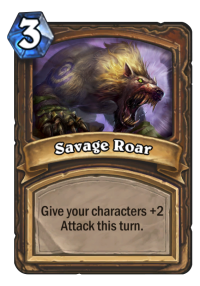
You know that spell, Savage Roar, which you normally use to push for lethal damage? You don’t do that here. If you’re holding onto the Savage Roar, you don’t keep it until you’re close to lethal. You use it as a board control too, to trade up. Let’s say you have 4 small minions on the board and your opponent has 2 mid-sized minions. With Savage Roar you can trade up and still be ahead on the board, while normally you would have to trade everything in.
The deck runs almost no burn damage from the hand. You can SOMETIMES get like 2x Bluegill + Savage Roar for 10 damage, but that’s rare. You rarely can do more than 6-7 damage from your hand. That’s the reason why dealing early damage is pointless; even if you get really close to killing your opponent, but they wrestle board control from you, then you simply lose, because you have no way to finish them.
Since Aggro decks generally don’t run AoE, you should still prioritize developing new minions over buffing the old ones, unless there is a good trade on the board after you buff. If you can choose between developing 2 minions and buffing 3 minions that are currently on the board, I’d say that most of the time you should develop and buff next turn (while probably playing yet another minion). The thing is, there is usually no punishment for doing that, so if you can, you do it. You buff it only when a) you have nothing else to do b) when a trade is going to happen very soon.
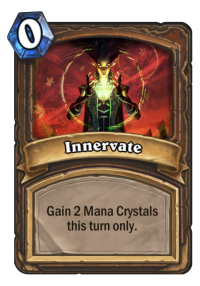
Try to abuse tempo gain from Innervate early. The player with board control dictates the trades, so if you get a big board as soon as turn 1 or 2, you should be able to get into the lead. Other good use for Innervate is getting out Finja, the Flying Star early. Finja on turn 2-3 is usually game over, especially if you summon 2x Warleader (it basically means that Finja almost always survives for the next hit).
Tortollan Forager is a slow minion and you generally shouldn’t play him if you have some faster things to do. It only puts a 2 mana 2/2 on the board, which sucks a lot. Of course, you draw a card, but most of the time you can’t really use it until the late game anyway.
Defender of Argus is often MVP in the slower matchups. Outside of a random Adapt, it’s your only way to gain Taunts, so use it wisely. It’s best in face rush matchups, like Pirate Warrior. If they equip an Arcanite Reaper and start swinging you face, Taunting up even 2 small minions should give you a lot of value (2/2 often tanks 5 damage from the weapon and the second one 4 damage from Kor'kron Elite).
Even if you face a weapon matchup, like Pirate Warrior, sometimes playing a turn 1 Bloodsail Corsair without hitting a weapon is a good idea. You do that if it’s part of a bigger buff combo. E.g. Bloodsail Corsair + Coin + Fire Fly + Innervate + Flame Elemental + Mark of the Lotus. Those combos do happen and you can’t pass on that, you end up with 3x 2/3 and 2/2 on turn 1 (you use 4/5 of your hand to do that, but hey). Or let’s say if it’s your only play, you have no other 1-drop, then you probably still should do that. But otherwise, if you can play other 1-drop and you have no crazy turn 1/2 combo, then you generally wait for a weapon – most likely Fiery War Axe (because waiting for Arcanite Reaper is usually too slow).
Vs Control
Control matchups are vastly different from the Aggro ones. Here, you WILL have early board control unless you have an absolutely hideous starting hand (like 2x Living Mana and 2x Defender of Argus – then you can just Concede). There is no way any slower deck will be able to answer your early game tempo. You will dominate the first few turns, but then they will start coming back after few more turns. That’s why the best idea is to try to finish them as quickly as possible. Instead of a board control plan, you launch a face rush plan – tempo out and try to deal as much damage as possible while constantly refilling and buffing the board. If you can do the crazy turn 1 combo with Innervate, you do that, definitely. The only card that can even remotely threaten you is Doomsayer, but 7 health shouldn’t even be a problem.
When it comes to making trades – you do of course make them, but only in certain cases. For example, if your opponent plays a 1/3 minion and you have a 3/1 minion and a 3/3 minion. Then you want to clear the 1/3 with 3/3 and ultimately save both of them. Now, of course, sometimes you will lose damage that way, but most of the time you will gain it in the long run (if the 3/1 survives for 2 more turns, you’ve basically gained extra 3 damage, because otherwise it would be killed next turn).
Eggnapper is a surprisingly good card in this deck. Not only if you buff the first part it gets out of ping range (and it’s quite easy to do that), it basically has to be killed twice and it’s a great minion to play before a potential board clear so you don’t start with nothing. Pretty annoying for the opponent, gives you a potential multiple bodies to buff and push damage with, it’s pretty strong.
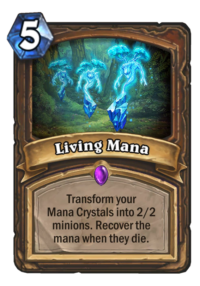
Living Mana is a great card against Control. Unless you play against Shaman that Devolves your board (don’t play that card against Shaman unless you REALLY need to), you usually get 5-6 2/2’s for one card. You see, the thing is that by the time you play it, you have no other plays anyway. You’re in a topdeck mode. And there are two options. If your 2/2’s don’t get removed, you have no mana next turn, but realistically – you’d probably draw a 1-drop or a buff anyway, maybe even Innervate, and have a nearly dead turn. So the fact that you have no mana to play with actually doesn’t matter that much. And if your 2/2’s get removed, then it’s 1 for 1, you get your mana back and it’s like nothing has happened. It’s a GREAT board refill in slow matchups. AoEs are really strong against your deck. But most of the opponents will use one around turn 4-6 to destroy your previous board. Then you can refill it with Living Mana. Not to mention that since you start with 1 mana after the Living Mana turn, you can still play Mark of the Lotus to get a huge AoE buff on all the 2/2’s.
Unlike vs the Aggro, in slower matchups you usually want to use Savage Roar as the finisher. But it’s also good for getting through the Taunt. E.g. your opponent plays a huge Taunt that contests your whole board – Savage Roar to kill it with 2-3 small minions (and possibly your Hero) is a good play, because otherwise it stops the damage.
General Tips
- If you have a Bluegill Warrior in your hand along with Finja, the Flying Star, try to keep it for after the Finja turn. After you attack with Finja, it’s a guaranteed 4/2 with Charge and maybe even 6/3 with Charge if you pull out two Warleaders – just for 2 mana. You can also combo Bluegill with Warleader on turn 5 if you’re holding onto two of those – individually they’re pretty weak, but if you can get both at the same time you at least get some Warleader value.
- After the first few turns, try to count your potential damage every turn, especially with Savage Roar in your hand. It’s so easy to burst the opponent down from 15+ out of nowhere with this deck and it’s very easy to miss lethal if you tunnel vision on the board.
- If you miss a 2-drop, you can use Power of the Wild to summon a 3/2. It’s not great, but some people forget that this card has two options.
- Innervate + Living Mana doesn’t work. I mean, it does work, but you don’t summon the extra 2 2/2’s from Innervate. You only summon 1 for every permanent mana crystal, not the temporary ones.
- When it comes to the Ravasaur Runt, I’d say that the best Adapt options are Divine Shield, +3 Health and Deathrattle: Summon 2x 1/1. Those are the 3 options that combo best with your deck. Windfury can be a good one if you’re ahead on the board and you won’t likely face an AoE, while Poisonous can be situationally good in some slower matchups that play big dudes (like against Taunt Warrior).
Aggro/Token Druid Card Substitutions
The deck is actually quite cheap. It runs a few expensive cards, but you should be able to make a budget version of the deck without hurting its power that much (it should still be enough for the rank 5 climb). Here are the expensive cards from the deck with potential replacements:
- Patches the Pirate – It’s a really good card, but you can play without it. However, if you remove Patches, you also want to get rid of Bloodsail Corsairs – those are there mainly as a way to pull Patches from the deck. You can replace them with e.g. Enchanted Raven or Golakka Crawler. Or you can go more all-in on the Murloc synergies and play Murloc Tidecaller and Rockpool Hunter, but this version is probably a bit weaker.
- Finja, the Flying Star – Just like in case of Patches, you don’t just remove this one card – you remove the whole Murloc package, because it’s too weak without the Finja. Same goes for Warleaders – if you don’t have them, remove the whole package. It frees up 5 slots, so you have to alter the deck significantly. If that’s the case, you also want to get rid of the Tortollan Forager and add the “beast” package instead. You remove 7 minions and play 2x Enchanted Raven, 2x Golakka Crawler, 2x Mark of Y'Shaarj and Bittertide Hydra instead. There is also a choice between 2x Hydra and 2x Living Mana, but ultimately which one is better depends on the matchup.
- Living Mana – It’s an Epic, and one that’s useless outside of this one deck, so a lot of people might not have it. To be fair, there is no other card with a similar effect, it’s really unique and it’s the only way to refill the board in the mid game so well. But if you don’t have it, you can run Bittertide Hydra as a replacement, but that’s also an Epic. If you want a more budget replacement, Vicious Fledgling sees some play in Aggro Druid lists and it’s Rare, so much more accessible.
If you’re missing most of those cards and you want to play a full budget list, check out this Aggro Beast/Token Druid deck by Evident.
Closing
If you have any questions or suggestions, feel free to leave them in the comment section below. If you want to be up to date with my articles, you can follow me on Twitter.
Good luck on the ladder and until next time!
Comments